How to Connect N3FJP software to
FLDigi
For contests
other than Field Day, there are some things you should be aware of and do to
N3FJP software and FLDigi before you can use them together.
The steps
are:
1. Connect
your sound card and turn it on.
2. Bring up
the correct N3FJP program and be sure that the following is set. Under Setup
some of the contests like NAQP have a "REQUIRED"
section. This section configures the N3FJP logger for4 the par4ticular
contest. For example, NAQP has a place in setup for the following: see below
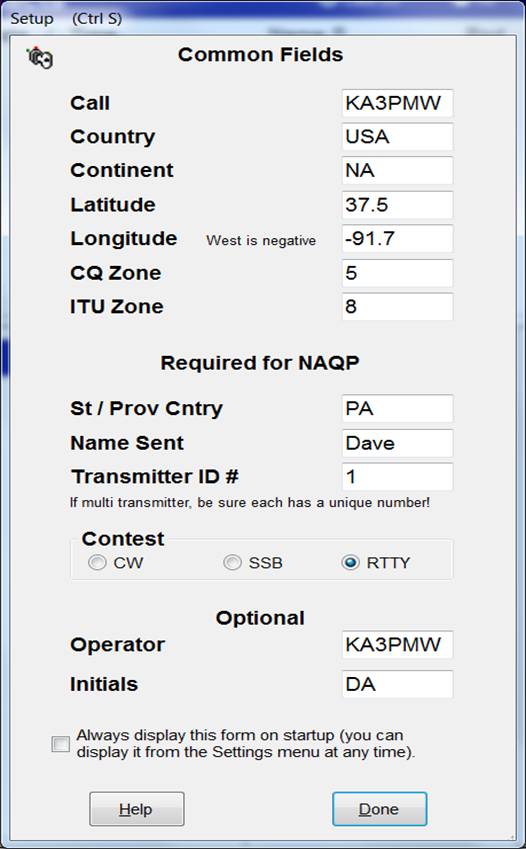
You need to
setup the State, The name you send and the transmitter ID you send. Also you
need to set the type of contest that it is. In the example above, RTTY is
selected. If this is not set correctly, N3FJP will reject the entry from FLDigi
and give you a message that the mode is incorrect. It will log the contact, but
the log will have the wrong mode.
The next
thing to check is the Application Program Interface (API) interface. Be sure it
is turned on and set as below:
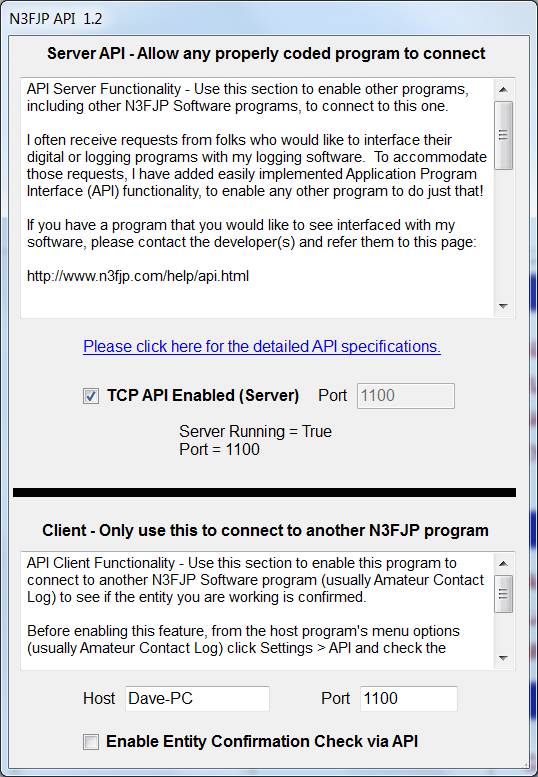
This is what
FLDigi connects to in order to transfer the information. If it is not set
correctly the transfer will fail.
Now that
N3FJP is set up correctly, minimize it. DO NOT CLOSE IT. It must be open while
you are using FLdigi. It is the first thing you open and the last thing you
close.
3. Now open
FLDigi. It shouldn't matter what other programs that you have FLDigi set up to
open. At this point we are going to set FLDigi to log to N3FJP.
First we
need to set up the Contest/Logging on the pull down menu. Click Configure > N3FJP logs from this menu. It should look like
this:
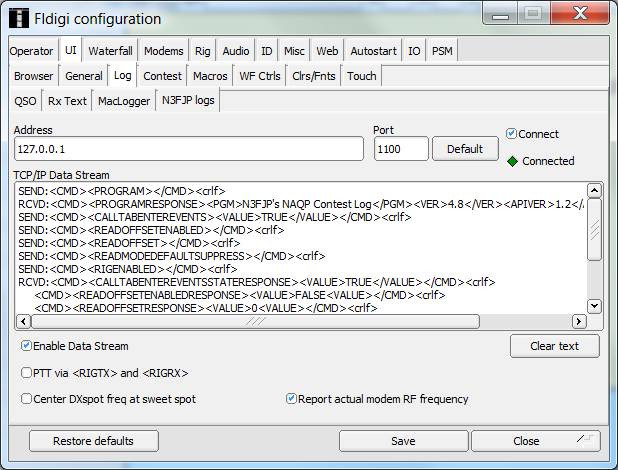
Be sure you
have the connect box checked. Once it is checked, it may take a few moments to
actually connect. When you get green in the diamond below the check box you may
click on Save and then Close.
The next
thing you have to do is set FLDigi for the contest. This is critical. Click
Configure > Contest. The screen must be set up this way:

You can opt
to leave the single click to capture Rx word unchecked if you like.
The next
thing to is to configure the radio mode. This has to be USB regardless of the
actual mode you are running. This is located under the frequency display. Finally select the Op-Mode
from the pull down menu.
Now you are
ready to go. I recommend that you test everything first. To do this, in NAQP,
send a call sign, name, and state. then transfer them.
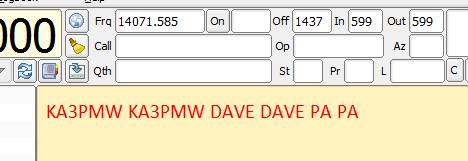
Click on the
name and call
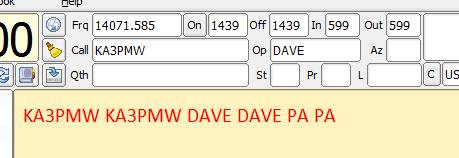
Now you need
the State. to transfer this, right click on the state and select state from the
drop down list.
Once that is
done you can click on the Save icon, the one above the 3 in KA3PMW in the above
screen shot, and that should send everything ti N3FJP and clear the fields. If
it fails the fields will not be cleared.
Be sure to
go to N3FJP and delete your test before the contest.